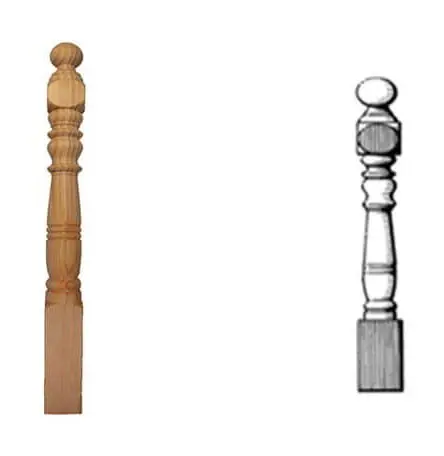
Droppers, Newels and Balusters: Put the Right Timber Part on Your Order
A photograph of turned timber is not always enough to identify the part. A dropper, a newel and a baluster may share similar curves, but they occupy different positions and need different information on an order.
Start by marking where the piece belongs on a full photograph of the verandah or stair. Then compare the dropper and newel range with the balustrade range. Naming the part correctly helps keep its section, length and quantity attached to the right product.
A dropper hangs below the beam
A decorative dropper finishes beneath the verandah beam instead of continuing down to the floor as a full post. It can repeat the turned detail across an opening without adding another full-height member.
The standard profiles described in Heritage’s range are V1D to V4D, with V5D available as a separate shop enquiry. The familiar V number helps relate a dropper to a post design, but it does not make the two products interchangeable. Include the D suffix and confirm the actual dimensions.
A newel finishes a balustrade run
A newel is the larger post at an end, landing or change of direction where the handrail meets it. Heritage lists N4A, N4B, N5A and N5B profiles, with size choices on the range and shop pages.
Choose the profile and section separately. Two newels may have similar overall lengths but different turning arrangements or square sections. The installer must also confirm how the newel will be fixed and how the adjoining rail connects; a decorative profile selection does not settle those details.
A baluster is a repeated member within the run
Balusters are the smaller members repeated between the larger posts and rails. Their quantities should be calculated from an agreed panel layout, not guessed from the number of newels in a photograph.
Use the balustrade planning guide for the information needed before quoting. Have the responsible building professional confirm the barrier design, spacing and compliance requirements for the actual location. A product photograph is not an approved barrier design.
Make a component schedule before adding quantities
Draw each run or bay and give it a label. Under each label, list the larger posts, smaller repeated members, rails and any hanging decorative parts. Put a separate line against each product code and size.
For example, an illustrative schedule could contain “bay A: two newels” and “opening above path: one dropper”. These describe different positions and must not be combined into “three turned posts”. Add the selected profile, section and length to each line before asking for prices.
Use the correct reference points when measuring
For an existing newel, record the overall length and the lengths of visible square and turned sections. Identify concealed or inaccessible portions instead of estimating them. For a dropper, show the underside of the beam and the full hanging detail.
Where a part is damaged, compare a sound neighbour and say which one is the matching reference. Do not remove or disturb a part that may contribute to support or barrier stability to obtain a measurement.
Keep the associated pieces in the brief
Include the handrail profile and any post cap when ordering a newel. A cap adds a separate shape at the top; it should not be assumed included from a photograph. See the post knobs and capitals for those choices.
Send the labelled photograph, component schedule, quantities and delivery postcode with your quote request. If an original does not match the catalogue, ask for a matching assessment before substituting the nearest-looking part.