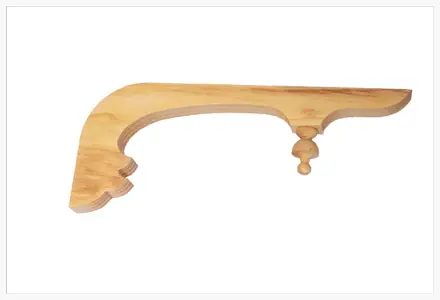
Corner Brackets or Eaves Brackets? Choose by Position Before Pattern
A decorative timber bracket can look right in a catalogue and still be the wrong item for the opening. Begin with where it belongs. A corner bracket sits at a post-and-beam junction; an eaves bracket belongs beneath the roof overhang. That distinction narrows the choice before you compare scrolls, curves or pierced details.
The Heritage bracket range separates CB corner designs from EB1–EB6 eaves designs. Use the product code alongside the picture so a similar-looking piece from a different family is not ordered by mistake.
Photograph the junction, not just the ornament
For a corner bracket, include the post face, beam underside and surrounding fretwork. A tight close-up records the carving or cut-out, but a wider image shows how much room exists around it. Include the full opening in a second photograph when you are repeating brackets across several bays.
For an eaves bracket, show its position under the overhang and its relationship to adjoining roof trim. State whether the photograph shows the original location or a loose component placed against the wall for reference.
Compare width, drop and thickness
Width is the horizontal reach; drop is the vertical depth. Thickness is the third dimension and matters when matching an existing piece. Record them separately. A bracket with the right overall silhouette can still project too far into an opening or finish above an adjoining detail.
Heritage’s catalogue brackets are fixed-size designs. Start with the listed dimensions and profile drawings; do not assume a selected bracket can be scaled to any opening. Where the original does not match a listed size, send a separate matching enquiry for workshop assessment.
Count positions before you count products
Sketch the frontage and mark each bracket location. Number the bays, note which side of each post receives a bracket, and identify corners or end bays that differ. This avoids ordering a bracket for every visible post when the actual layout calls for a different arrangement.
As an illustrative schedule, four identical bays with one bracket at each upper corner would contain eight bracket positions. That is a counting example, not a standard verandah arrangement. Use the actual junctions on your house, and ask the workshop about handed orientation if your selected design makes that relevant.
Match the pattern without assuming the code
Old paint can hide a pierced edge, soften a point or make two profiles look alike. Photograph the outline square-on and keep any sound original piece. State which surviving bracket is the reference, particularly if the frontage already includes replacements.
The custom timber matching service can assess a photograph, drawing or sample. Include dimensions and material requirements. A familiar period label such as Victorian or Federation helps describe the setting, but it does not specify a particular bracket.
Keep support and decoration separate
A decorative bracket image does not provide a structural load rating. If a junction needs to support a roof, beam or other load, the responsible building professional must determine that support and its fixings. Do not substitute a decorative catalogue part for an engineered connection.
Compare the selected bracket with the post profile and adjoining fretwork before the quote is finalised. They meet visually at the same junction, even though they are ordered as separate items.
A useful bracket order contains
- CB or EB code and the listed size.
- Width, drop and thickness of any original being matched.
- A marked photograph or bay sketch showing every position.
- Quantity by code, not one combined total for mixed designs.
- Exposure, finishing requirements and delivery postcode.
Send your bracket schedule for a quote. Confirm the individual size, quantity and intended position before treating a basket of similar photographs as a finished specification.