Choosing and Measuring a Timber Window Canopy for a Period Home
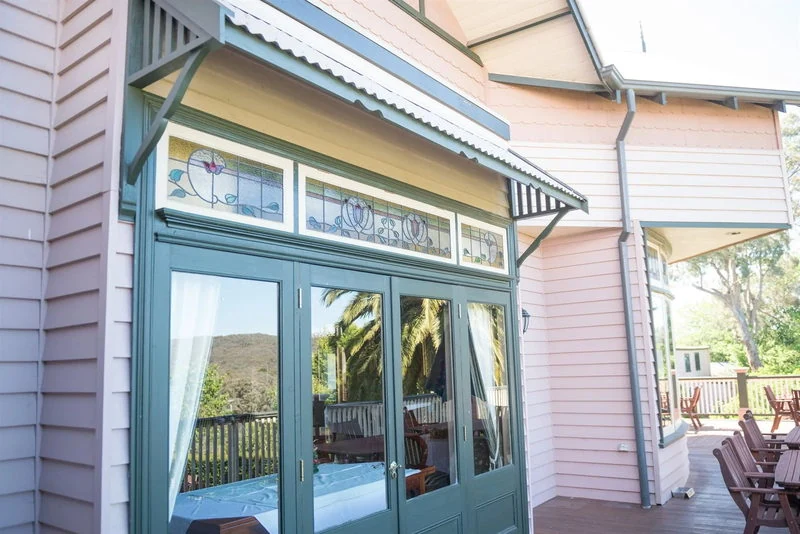
Quick answer
Measure the opening width, the required projection and any architrave or reveal that the canopy must clear. Choose the design by the proportions of the window or door and the surrounding period detail, not by width alone.
A timber window canopy is a small architectural element, but it sits at eye level and casts a strong line across the facade. The right canopy can shelter a window and reinforce period character. The wrong proportions can make the window feel cramped or make the canopy appear attached as an afterthought.
Measure the opening and the wall around it
Record the overall width and height of the window, including architraves or external trim. Then measure the clear wall available on both sides and above. Downpipes, meter boxes, verandah beams, eaves and adjacent windows may limit the canopy width or bracket position.
Photograph the full facade as well as the window. The wider image shows whether the proposed canopy should align with another horizontal element such as a verandah beam or sill line.
Think about projection
Projection is the distance the canopy extends from the wall. More projection can provide more shade and weather shelter, but it also increases the visual and structural demand on the brackets and fixings. Record paths, gates and doors below so the canopy does not interfere with movement.
Choose details already present on the house
Look at the curves and profiles in the verandah posts, brackets, gable and fretwork. A canopy does not need to copy every ornament, but one repeated shape can make it feel connected to the rest of the building.
Heritage Decorative Timber’s timber window canopy range provides a useful reference for available styles and the difference between a standard choice and a made-to-order requirement.
Check the fixing surface
Identify whether the wall is weatherboard, masonry or another construction and show the proposed fixing area in photographs. The finished installation must be assessed and carried out with suitable fixings for the wall and canopy. If the wall condition is uncertain, have it checked before ordering.
Send these details
- Overall window and trim width
- Clear wall space at each side and above
- Preferred canopy width and projection
- Wall construction
- Full-facade and close photographs
- Preferred design or reference image
- Any matching brackets or decorative details
Exterior timber needs complete preparation before it is fixed high on a wall. Confirm the supplied painting instructions, prime edges and concealed faces, and plan safe access for future inspection and maintenance.
Continue planning your project
- How to Measure a Gable for a Decorative Timber Infill
- How to Measure an Opening for a Custom Timber Gate
- Planning a Timber Balustrade: What to Decide Before Requesting a Quote
- How to Measure Outdoor Stairs Before Ordering a Timber Stair Kit
- Timber Louvres, Shutters and Screen Doors: Which Do You Need?
- How to Prepare and Paint LOSP H3 Treated Pine Before Installation