The Parts of a Period Verandah Explained
Quick answer
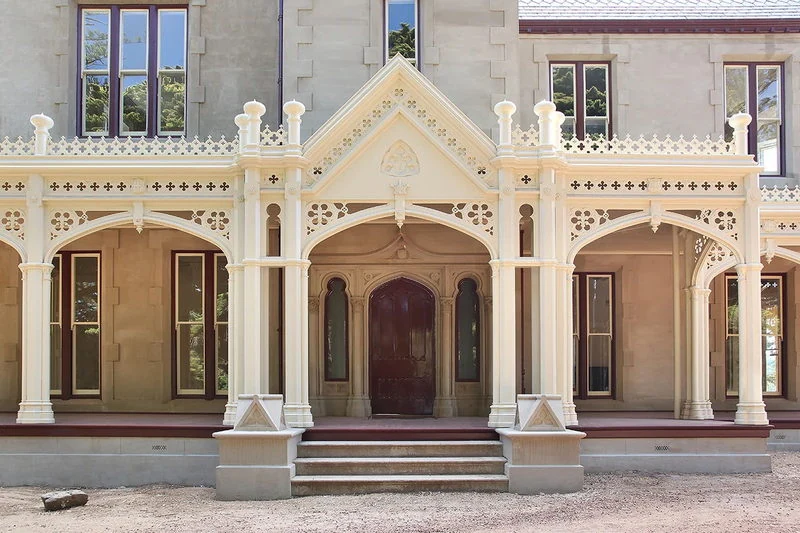
A period verandah combines posts, rafters, fretwork or frieze panels, corner brackets, balustrades and roof-edge details. Gable work may also include barge boards, an infill or vent and a finial; each component has a different location and measuring method.
A period verandah is a collection of separate timber components that have to work together. Knowing their names makes it easier to photograph a problem, compare designs and request an accurate quote.
This guide uses the workshop terminology from the Karem Woodcraft architectural timber brochure. The names are useful whether you are restoring an original verandah or planning period-style detail for a newer home.
The main structural and decorative parts
Verandah posts are the upright supports. They may be turned on a lathe, routed with flat faces and chamfers, or built up with separate capital and base mouldings. A newel post finishes a balustrade or stair run. A dropper is a smaller hanging turned detail, commonly used beneath fretwork.
Verandah rafters create the roof profile. Common shapes include bullnose, concave, convex and Olde Gothic. Their curve is described by a radius, so ordering them requires more than a straight length measurement.
Fretwork or frieze panels span between posts near the top of the verandah. Corner brackets sit where a post meets a beam. Smaller repeated brackets under an eave are normally called eaves brackets.
Parts around the gable
Barge boards run along the sloping edges of a gable. A gable infill is the decorative panel fitted inside the triangular opening. A gable vent introduces ventilation through a shaped opening, while a finial is the vertical turned detail at the gable apex.
These pieces are related but not interchangeable. A clear photograph showing the entire gable is more useful than a close-up of one detail because it shows how the pieces meet.
Balustrade terminology
A balustrade panel is the railing between posts. It normally includes a handrail, base rail and repeated vertical balusters or slats. On stairs, the equivalent sloping assembly is often called a flight panel. If you are requesting a replacement, measure between the posts rather than assuming that the old panel itself is square or complete.
What to photograph before asking for help
- One wide image of the full verandah elevation
- A straight-on image of each decorative component
- A close image showing the profile and joints
- A tape measure visible against the width, height and thickness
- Any surviving matching component elsewhere on the house
You do not need to know every product name before calling. “The curved piece under the beam” is enough to begin, but this vocabulary helps everyone confirm the same part before it is made.
Decide what must match and what can be replaced as a group
A single damaged part usually needs a close match to the surviving row. If the entire element is missing, the design can instead be selected to suit the home’s era and the proportions of the opening. Use the decorative timber identification guide to compare product locations, then review the project galleries for complete elevations rather than isolated product photographs.
Before replacing structural components, confirm the proposed work with the builder, designer or other responsible professional. Decorative product information does not replace an assessment of the existing structure.